Revitalizing Sea Moss Gel: Your Go-To Superfood Base
Have you ever stumbled upon a food that sounds more like a trendy wellness product than something you'd actually want to eat? enter sea moss gel .
I remember the first time i saw someone toss it into their smoothie like it was the holy grail of health.
It made me curious, but honestly, it also made me a little skeptical. well, let me tell you that skepticism didn't last long.
Once i got a taste of this caribbean superfood, i was hooked!
Sea moss has been around for ages, celebrated for its thickening properties and impressive health benefits . sea moss gel recipes pop up everywhere these days.
You can add it to smoothies, desserts, soups, and even slather it on your skin! yep, this nutrient dense gel is as versatile as it gets.
And trust me, with just a few steps, you’ll have your own jar of it ready to go.
Recipe Overview
Now, let’s dive a little deeper. sea moss, also known as irish moss, has roots tracing back to the caribbean islands.
It was traditionally used in recipes and remedies for centuries. and today? well, it’s making waves (pun intended) as a go-to health booster in modern kitchens.
You see, making sea moss gel is a walk in the park. we’re talking about easy preparation and an active prep time of around 15 minutes.
Add in some soaking time (4 to 12 hours) and it’s more about planning than difficulty. the best part? you can whip up about a cup of this gel, and it won’t cost you an arm and a leg.
People love the stuff because it adds nutrition without much effort. Talk about a win-win!
Key Benefits
So, why should you jump on the sea moss train? let’s break it down. first and foremost, sea moss health benefits are remarkable.
Packed with vitamins and minerals, it’s like nature’s multivitamin. a couple of tablespoons can support your digestion, boost your immune system, and deliver a wave of hydration thanks to its gel-like consistency.
And did i mention it’s a great vegan gel thickener for your recipes?
This gel isn't just great for the insides; oh no! seemingly like a magic potion, sea moss gel for skin is a game changer.
Slap a little on your face, and you could be looking at reduced redness and improved hydration. plus, it’s perfect for special occasions! planning a cozy dinner? toss it into a soup.
Hosting brunch? blend it into smoothies or even make some fancy sea moss desserts to wow your guests.
And let’s not forget about all the sea moss recipes for weight loss . this superfood isn’t just about filling your tummy; it helps to keep you satisfied longer while being super low in calories.
By now, you might be asking, “how do i make this magical sea moss gel?” trust me, it’s easier than pie or should i say, easier than finding pie at a family gathering! let’s gear up for the ingredient list where all the fun begins.
Mixing, soaking, and blending these steps are all part of the adventure. and it’s all about experimenting and finding your sea moss gel variations .
Stick around; i can't wait to share how to whip up your batch of sea moss gel next!
Essential Ingredients Guide
Cooking can be a journey, and what better way to enjoy that ride than with the right ingredients? let's dive into some essential components that make everything taste just a bit better.
Whether you’re whipping up a family dinner or experimenting with new sea moss gel recipes , having a solid ingredient foundation is key.
Premium Core Components
First things first, let’s talk about the premium core components you should always have on hand. Here’s the scoop on what makes them special.
A. detailed measurements:
using 1 cup of flour might seem simple, but did you know that's around 120 grams ? always have your metric and imperial measurements close by.
It’s like knowing the cheat codes to your cooking success.
B. quality indicators:
you ever bite into a tomato that just tastes… blah? look for firmness and vibrant color.
For spices, fresher is always better check the packaging date. if it’s older than your last birthday, it’s time to toss it.
C. storage guidelines:
herbs can be tricky. keep them in a cool, dry place to avoid that sad, wilted look.
And don’t even get me started on shelf life! honey never spoils, while some spices might lose their gusto after just six months.
D. freshness tips:
when selecting ingredients, take the time to sniff! a fresh herb will smell vibrant and earthy.
Don’t be shy; take inventory of your pantry regularly to keep it in tip-top shape.
Signature Seasoning Blend
Now, let's spice things up a bit. Your food needs soul, and that's where signature seasoning blends come into play.
A.
Essential Spice Combinations:
Think about cumin and coriander united in a heavenly blend or the magic of garlic powder and onion powder that can turn ordinary dishes into extraordinary ones.
B.
Herb Selections:
A classic combo? Basil and oregano for pasta dishes. You could also go rogue and try thyme and rosemary in your roasts. Trust me; it’s unreal.
C.
Flavor Enhancers:
Don’t underestimate the power of a squeeze of lemon or a sprinkle of nutritional yeast it’s the secret sauce of flavor enhancement!
D. regional variations:
got a caribbean flair? coconut and lime can brighten up any dish. looking for alternatives? don’t fret experiment.
Just go with your gut; cooking is like jazz the more you improvise, the sweeter it sounds.
Smart Substitutions
Let's get smart about how we approach our ingredients. Sometimes life throws a curveball, so you gotta be ready!
A.
Common Alternatives:
No sea moss? Try
agar agar
for that gelatin like texture. It’s a solid
gelatin alternative
if you’re vegan or vegetarian.
B.
Dietary Modifications:
If you’re going dairy-free, unsweetened almond milk is your best friend. There are endless options out there stretch those creativity muscles!
C.
Emergency Replacements:
Oh, you’re out of vanilla extract? Grab some maple syrup or even a splash of rum if you’re feeling adventurous.
D.
Seasonal Options:
In summer? Load up on fresh herbs. In the colder months, dried herbs bring warmth and richness to your meals.
Kitchen Equipment Essentials
You’ve got your ingredients; now let’s chat tools. A well stocked kitchen can make or break your culinary adventures.
A.
Must Have Tools:
Every home cook needs a trusty chef’s knife, a cutting board, and a good set of measuring cups. Make sure they’re always clean and ready to go.
B.
Alternative Equipment Options:
Didn’t invest in a fancy blender yet? A mason jar with a lid can help you shake things up for salad dressings. MacGyver your way through it!
C.
Preparation Tips:
Prepping ingredients ahead of time can save you from a last minute frenzy. Chop veggies in advance and store them in air-tight bags for the week.
D.
Storage Solutions:
Invest in good containers. You don’t want that
sudden explosion of spices
when you go to grab a handful. Again, organization is key, my friend!
Alright, now that we've laid the groundwork with all these essentials , it’s time to get your hands dirty. ready to put these pointers into action and start on some delicious sea moss gel recipes ? trust me, you're going to love how easy it is to incorporate this superfood into your meals.
Let’s whip up something fantastic!
Mastering Professional Cooking: The Heart of Culinary Success
Alright, folks! if you’ve ever dreamed of whipping up restaurant quality meals at home, or just want to impress your friends with killer dishes, you gotta get the basics down.
Let’s dive into the professional cooking methods that can transform your home kitchen into a sanctuary of flavor, starting with some essential preparation steps.
Essential Preparation Steps
Mise en place it's like the secret handshake of kitchen mastery. this fancy french term just means you need to prep everything ahead of time.
Chop your veggies, measure your spices, and make sure you’ve got all your tools ready to go. trust me, this makes everything smoother and less chaotic.
Next up, time management . oh boy, this is crucial! when you’re juggling pots and pans, it’s easy to lose track of time.
Try keeping a timer handy. timing is everything , especially when you’re baking or simmering more on that later!
Organization strategies keep your workspace tidy. a clean kitchen is a happy kitchen. it helps you stay focused and find what you need without frantically searching through piles of stuff.
If things start to get too crazy, step back, take a breath, and regroup.
And hey, let’s not forget about safety considerations . always have a cut-resistant glove when chopping, and remember, hot pans can bite back .
Keep a first aid kit handy, just in case you have one of those “oops” moments.
Step-by-step Process
Now, let’s break it down with clear, numbered instructions . Follow this like a recipe you’ll thank me later.
- Preheat your oven to 375° F ( 190° C).
- Gather all ingredients and tools.
- Cook proteins until they reach the correct internal temperature . For chicken, it’s 165° F ( 75° C).
- Monitor veggie doneness visually; think about those bright colors— that’s how you know they’re ready !
- Taste as you go. Believe me, nothing beats the joy of adjusting flavors to perfection.
When timing things, keep a close eye— 5 minutes too long can turn that juicy salmon into a dry, sad piece of fish.
Expert Techniques
Alright, let’s get fancy! some professional methods you might want to add to your arsenal include sous vide cooking , or even just understanding how to properly sear.
The sear is where flavor happens! that crispy exterior? total game changer.
Now, critical steps are important. One that I learned the hard way is letting dough rest before baking. It really changes the texture.
For those quality checkpoints, always check textures and flavors. A little nibble here and there doesn’t hurt, folks!
And if things aren’t going as planned, don’t sweat it! troubleshooting tips include adding more liquid to dry dishes or diluting overly salty soups with unsalted broth.
Don’t let a snag wreck your meal!
Success Strategies
Here’s where it gets serious avoid common mistakes like overcooking or underseasoning. It happens to the best of us. Make sure to taste your food throughout the cooking process.
Want to ensure quality? Set up quality assurance checkpoints. Look for good color and texture. If something looks off, it probably is.
For those of you who want spin off ideas, consider make-ahead options ! Prepping some of your meals a day or two in advance can save tons of time during the week.
Oh, and if you’re a fan of sea moss gel recipes , listen up! it’s such a cool way to enhance your dishes while reaping those amazing sea moss health benefits .
You can bulk up your smoothies or bake with it for a healthy kick. seriously, you should check out how versatile it is!
Wrapping Up with Additional Information
As we wrap things up, remember that cooking is as much about technique as it is about joy. whether you’re experimenting with sea moss gel uses in your smoothies, desserts, or even baking, every experience in the kitchen counts.
If you want to dive deeper into sea moss gel variations or explore new cooking methods, hit me up! i’m here for all your culinary adventures.
Cooking is a journey let’s enjoy it together!
Pro Tips & Secrets for Sea Moss Gel Recipes
Alright, let’s talk about some pro tips for making the ultimate sea moss gel . first off, make sure to thoroughly rinse your dried sea moss before soaking.
Seriously, you don’t want any sandy surprises when you dig in. i learned that the hard way!
Now, when it comes to soaking, time is your friend . aim for a soaking period of 4 to 12 hours .
That way, the sea moss can do its magic and get all nice and gelatinous. if you're rushed, go for the shorter soak, but plan for the longer soak whenever you can.
For flavor enhancement , add a splash of coconut water when blending. not only does it taste great, but it also packs that beachy feeling! and let me tell you, pairing that with a sea moss smoothie recipe is a match made in culinary heaven.
When it’s time to serve, visually appealing dishes can take your meals to the next level. ever heard of the saying, “we eat with our eyes first?” just like when you're scrolling through tiktok and see those vibrant dishes pop up!
So, if you’re crafting a bowl with sea moss gel , try plating it with some colorful fruits and nuts on top.
Perfect Presentation for Sea Moss Gel
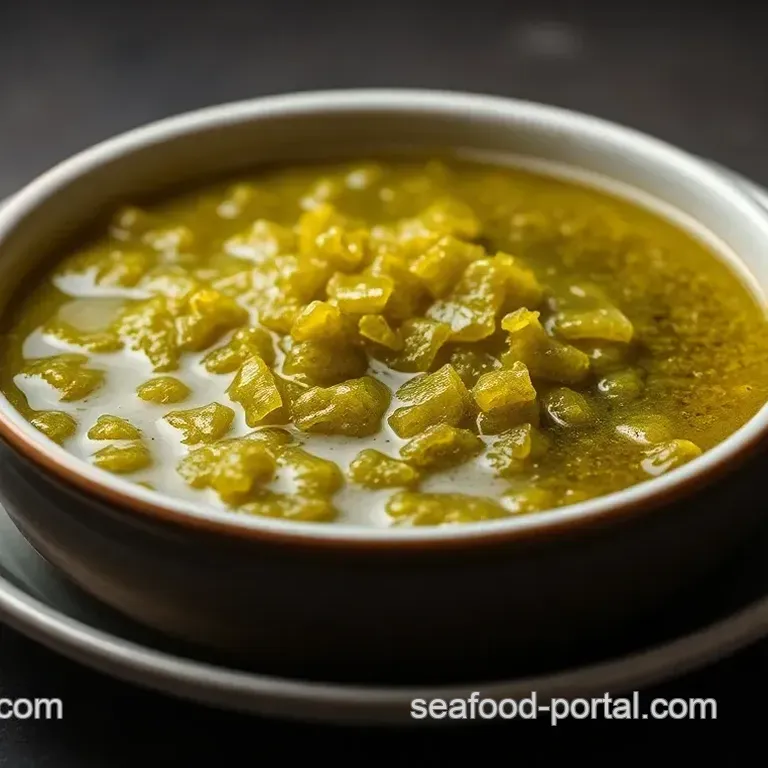
Speaking of being eye-catching, let’s chat about how to make your sea moss gel look beautiful. start with simple plating techniques less is more! a clean, white bowl can highlight the beautiful textures of the gel.
Add a generous dollop of the gel in the center and let it spread out a bit.
For garnishes, think fresh mint leaves or slices of lime. they not only add color but also enhance the overall flavor.
A bright green and yellow combo? yes, please! it’s like a party for the eyes.
And don’t forget about color combinations . If you’re mixing sea moss gel into a smoothie, why not throw in some blueberries or spinach for that dreamy green and purple swirl? It’s all about creating that visual appeal!
Storage & make-ahead Tips
Now, let’s get to the practical side of things. if you’ve made a big batch of sea moss gel, proper storage is key.
Pop it in an airtight container , and it’ll last in the fridge for about three weeks . yup, that means you can prep ahead of time and have it ready for any recipe, from sea moss desserts to soups.
If you're feeling adventurous, try pouring your gel into ice cube trays. freeze them, and you’ll have perfect little sea moss gel cubes ready for your smoothies whenever you need ‘em.
Just toss a cube in, and it’ll blend in like a champ!
When it comes to reheating, you really don't want to. Instead, use it straight from the fridge or thaw your frozen cubes. No need to lose that lovely, gooey texture!
Creative Variations to Try
One of the coolest parts about sea moss gel is how versatile it is. want to add a twist to your gel? infuse it with vanilla or almond extract for a little sweetness.
You can also experiment with fruits while blending. try tropical vibes with mango, or keep it classic with a banana.
And if you’re feeling seasonal, toss in some pumpkin spice blend for that fall flavor. I mean, who doesn’t love a good pumpkin recipe, right?
For those with dietary needs, sea moss gel acts as a vegan gel thickener . So if you’ve got allergies, don’t worry; you can absolutely use this in baking!
Complete Nutrition Guide
Let’s take a quick look at the nutritional breakdown . sea moss gel is jam-packed with vitamins and minerals. did you know it offers around 10 calories per serving ? it’s low-calorie and a fantastic protein source too.
Sea moss health benefits include promoting good digestion, thanks to its fiber content. Plus, it can support healthy skin, making it a go-to for sea moss gel for skin and beauty routines.
But, always keep in mind portion sizes! About 2 tablespoons at a time is a great amount to start with to avoid overwhelming your system.
Expert FAQ Solutions
Got questions? i feel you! a lot of folks wonder how to get that perfect texture or what to do if their gel is too thin.
If it’s not thick enough, just add more sea moss next time or let it soak longer. it’s all about trial and error, honestly.
Anyway, don’t stress about it! Cooking is meant to be fun. And hey, if a sea moss gel recipe doesn’t turn out perfect, you can always tweak it into a new dish or dessert!
In the end, play around! whether it’s incorporating sea moss gel in soups or smoothies, each variation you try makes it a little more yours.
And remember, cooking is an adventure every time you hit the kitchen!
So grab that sea moss and dive in! You got this!
Revitalizing Sea Moss Gel Your Go To Superfood B

