Fluffy & Easy Cheddar Bay Biscuits
Oh my gosh, i remember the first time i had those dreamy cheddar bay biscuits at a popular seafood restaurant.
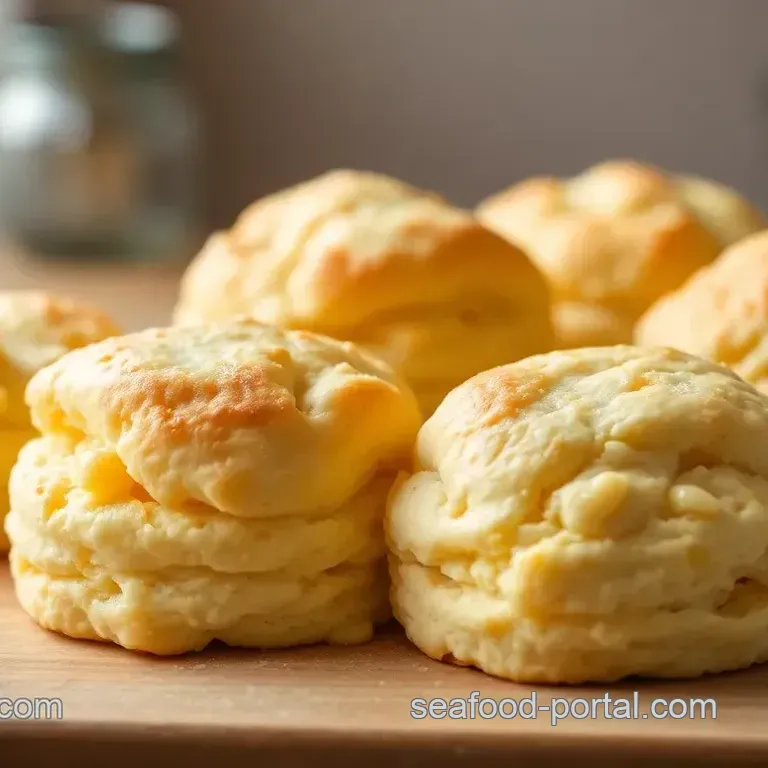
I almost couldn’t believe how fluffy and buttery they were! seriously, they melted in my mouth. ever since that day, i've been on a mission to recreate that same magic at home hence the birth of my go-to recipe for baking cheddar bay biscuits - fluffy & easy .
If you’re a fan of cheesy garlic biscuits, trust me, this will be your new favorite!
Let’s take a stroll down memory lane : this recipe is inspired by those classic seafood restaurant biscuits, and they’ve somehow become a big hit at family gatherings and brunches.
With their flaky biscuit texture and rich cheddar flavor, these biscuits aren’t just a side dish; they’re a crowd pleaser!
Recipe Overview
Now, let’s dive into a little bit of history. this cheddar bay biscuits recipe is inspired by a certain well-known chain that’s famous for its delicious seafood.
What’s crazy is how they've transitioned from being just a restaurant treat to a beloved staple at home. everyone seems to be craving those buttery, garlicky delights!
Wanna know how easy it is? seriously, this is an easy biscuit recipe that requires only about 30- 35 minutes of your time from start to finish.
The prep takes just 15 minutes, and then you pop them in the oven for 15 to 20 minutes. you’ll be outta your kitchen and into the taste town in no time!
And let’s talk costs. this recipe yields about 12 biscuits . you can whip up these bad boys for less than what you’d pay for frozen biscuits at the store.
Plus, you get to brag about how you made them all by yourself. winning!
Key Benefits
But wait, there’s more! these fluffy biscuits are not only delicious but also pack a nutrient punch. with the right mix of cheddar cheese and wholesome ingredients, you’re looking at a pretty good snack.
Plus, if you skip the butter glaze, you can whip up a gluten-free biscuit variation that still rocks!
But here’s the kicker : these biscuits aren’t just perfect for dinner. they make a fantastic party appetizer! you know those times when you’re feeling fancy at brunch? bust out these homemade cheddar biscuits next to some eggs or even biscuits and gravy .
And let’s not forget how they can elevate your soup game perfect for dipping!
They’ve got that savory twist, too, so they’ll play nice with just about everything on your plate from southern style dinners to light lunches.
If you’ve got thanksgiving or another special occasion coming up, don’t think twice about whipping these up. everyone will be coming back for seconds (or thirds).
Now, let’s get to the good stuff ingredients! You’ll want to gather some basic kitchen staples, but don’t worry, there’s nothing fancy involved. You probably have most of it right in your pantry!
So, are you ready to turn your kitchen into a little bakery? Grab those mixing bowls, and let’s get to work on these delightful fluffy biscuits that are bound to impress!
Essential Ingredients Guide
When it comes to cooking, having the right ingredients is everything! let’s dive into what you need to whip up those fluffy & easy cheddar bay biscuits that everyone raves about.
Seriously, these biscuits get raved about like they’re celebrity chefs!
Premium Core Components
You know the difference fresh ingredients can make, right? Here’s a quick rundown to enhance your baking game:
- Detailed Measurements: For those of you weighing things out, you'll want 2 cups (250g) of all-purpose flour. If you're not measuring, just use the cup it's just as reliable!
- Quality Indicators: Fresh flour should smell clean and a little nutty. And trust me, if your baking powder is clumpy? Toss it. That stuff should be light and fluffy!
- Storage Guidelines: Keep flour in an airtight container. It can chill in the pantry for about 6-12 months . After that, it’s like a bad prom date the freshness just isn't there anymore.
- Freshness Tips: Grab cheddar cheese that’s sharp and smells strong. If it looks crumbly, that’s a red flag. You want to think heavenly cheesy bites!
Signature Seasoning Blend
Now let's talk flavors. You can’t have homemade cheddar biscuits without the right kick!
- Essential Spice Combinations: Garlic powder is key for that savory profile— 1/2 teaspoon for a hint and 1 teaspoon for a strong hit. Throw in a pinch of cayenne for fun if you’re feeling sassy.
- Herb Selections: Parsley or even chives bring a fresh touch. Pair them with ever growing garlic goodness and your taste buds won’t know what hit ‘em!
- Flavor Enhancers: Think about adding a dollop of sour cream into the mix for even more tenderness.
- Regional Variations: Got a bit of Southern charm? Try replacing the cheese with classic Southern flavors like pimento cheese. Trust me; it’s a game changer!
Smart Substitutions
Every cook faces a “yikes” moment in the kitchen. Like when you realize you're out of something vital. Here’s how to save your biscuits, no stress:
- Common Alternatives: Running low on flour? Swap in some whole wheat. Just know you might get a slightly denser biscuit.
- Dietary Modifications: Need gluten-free? Use a blend of almond and coconut flours together. They won’t taste the same, but you'll still get a flavorful bite!
- Emergency Replacements: No buttermilk? Add a splash of vinegar to regular milk and let it sit for a few minutes. Instant buttermilk!
- Seasonal Options: If you have fresh herbs handy, use dill or rosemary instead of parsley. Totally different flavor, but equally bangin’!
Kitchen Equipment Essentials
Let’s make sure you’re equipped to create those flaky biscuit textures we all crave!
- Must Have Tools: You definitely need mixing bowls, a whisk, and a good baking sheet. Do I even need to mention parchment paper? It's a game changer.
- Alternative Equipment: Don’t have a pastry cutter? No worries! A fork works just as well for cutting in the butter.
- Preparation Tips: Chill your tools and butter before starting. I promise this gives you the light and fluffy biscuits we all dream of!
- Storage Solutions: Keep those biscuits in an airtight container, and they'll stay tasty for a couple of days. But honestly, who can resist warm biscuits fresh outta the oven?
So, as you gear up to bake those delicious biscuit ideas and create baking biscuits from scratch , don’t forget to gather your ingredients and get ready for some serious yumminess.
In the next section, we’ll dive deep into the step-by-step instructions for baking cheddar bay biscuits - fluffy & easy that’ll leave your friends begging for the recipe!
Let’s get our bake on!
Discovering the Joy of Professional Cooking Methods
When you're diving into the world of baking, especially something delightful like baking cheddar bay biscuits - fluffy & easy , have you ever thought about how chefs whip up such masterpieces? it’s about more than just throwing ingredients together; it’s all about method.
Buckle up, my friend, ‘cause we’re diving into the essential methods of professional cooking that’ll turn you into a kitchen superstar!
Essential Preparation Steps
Before you even think of turning on that oven, let’s start with mise en place that fancy term just means having everything in its place.
Prepare and measure out all your ingredients first. for our cheddar bay biscuits recipe , have your 2 cups of flour and about 1 cup of sharp cheddar cheese at the ready.
Now, time management is crucial. the prep time should take around 15 minutes , followed by a quick 15-20 minute bake .
Set a timer, my friend! no one wants burnt biscuits.
Being organized can save your sanity. create a clean space where you can easily view and reach your ingredients. and don’t forget about safety! always keep your workspace tidy and keep hot pans away from the edge of the counter.
step-by-step Process
Let's get into the nitty gritty! Here’s how to make those butter drenched, garlicky Cheddar Bay Biscuits like a pro:
Preheat the oven to 425° F ( 220° C) —that’s crucial for fluffy, golden results!
In a large bowl, mix your dry ingredients like flour , baking powder , and spices together. Whisk them until they're combined.
Now for the butter. You wanna cut in that cold unsalted butter until it looks like coarse crumbs. This gives your biscuits that flaky, melt-in-your mouth texture.
Toss in the shredded cheese and gently fold it in. Don’t overdo it; we want to keep our biscuits light and fluffy !
Pour in the whole milk . Stir until just combined trust me, more mixing is not your friend here.
Scoop and pat that dough into a 1 inch thick disk . Cut out biscuits or form them freehand.
Bake for 15- 20 minutes or until they’re golden brown . Here’s a pro tip: turn your baking sheet halfway through for even coloring!
While waiting, mix melted butter with garlic powder and parsley. Brush that on right after you take the biscuits out of the oven.
Expert Techniques
Now, let’s talk about the extra magic! you want those biscuits to be foolproof, right? start by checking your baking powder's freshness .
Old stuff leads to sad, flat biscuits. nobody wants that!
Keep an eye on timing. For truly terrific, light and fluffy biscuits , don’t forget the temperature control ! That oven should be hot, hot, hot. Proper timing precision is key here.
If your dough looks a bit too sticky, just sprinkle a little more flour it’s all about adjustments. don’t fret too much; every pro has had their mishaps.
If it’s not coming together, take a deep breath and re-evaluate. this isn’t an olympic sport; it’s just biscuits!
Success Strategies
Okay, let’s avoid the common pitfalls. Don’t overmix your biscuit dough; that leads to tough biscuits, and that’s a culinary crime! Remember, we want buttery biscuits , not bricks.
Quality checking is important too. make sure your biscuits have a nice golden color . they should feel soft but not doughy inside.
Use a toothpick for an extra reality check if it comes out dry, you’re golden!
And hey, you can make these ahead! Just bake the biscuits and store them in an airtight container for a few days. Reheat them briefly in a warm oven easy peasy!
So, there you have it, my friend! these invaluable homemade baking tips paired with our cheddar bay biscuits recipe are bound to elevate your baking game to new heights.
Trust me, you’ll impress your taste buds and your dinner guests. stick around because we’ve got more information on deliciousness coming up next!
Additional Recipe Information for Fluffy & Easy Cheddar Bay Biscuits
Pro Tips & Secrets
Oh my gosh, if i had a dollar for every time someone asked me how to make the perfect biscuit, i’d be rich! so, let’s dive into some pro tips to help you nail those fluffy biscuits .
Chef's insights : first off, make sure your butter is cold. seriously, it makes a difference. cold butter creates those irresistible layers that give you that flaky biscuit texture we all love.
I even pop mine in the freezer for a few minutes before mixing in.
Time saving techniques : you can make the dough the night before! just keep it in the fridge. this saves you time and makes those homemade cheddar biscuits even more flavorful as they chill.
Flavor enhancement tips : next, don't skip the garlic powder it’s a game changer. and if you wanna kick things up a notch, toss in some fresh herbs like thyme or rosemary for an extra layer of goodness.
Presentation Tips : Brush those biscuits with a little extra melted butter before serving. It makes them shiny and more inviting. Plus, who can resist a buttery biscuit?
Perfect Presentation
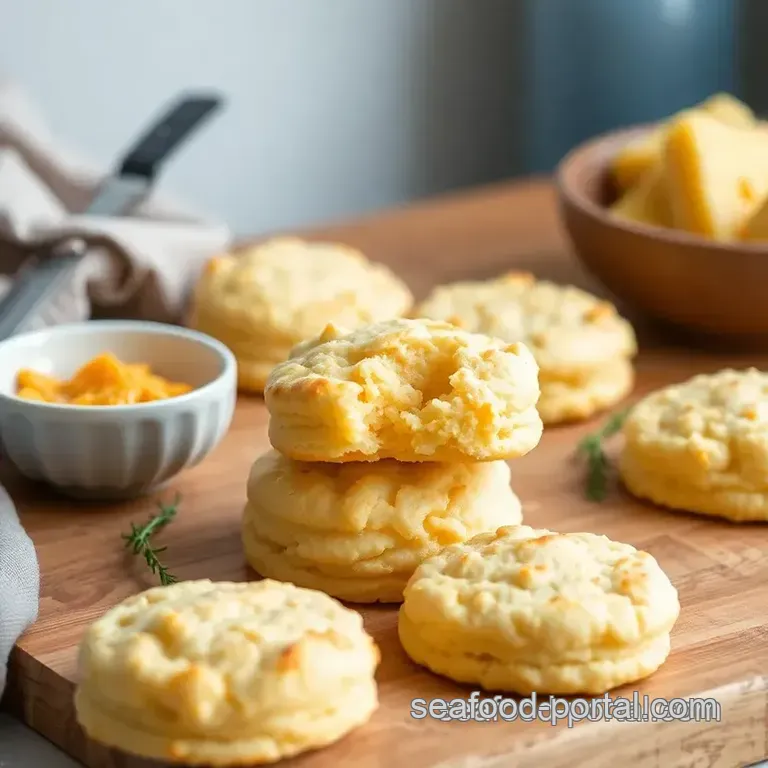
When it comes to serving, let’s talk about that perfect presentation ! Plating is key, especially if you’re serving guests.
Plating techniques : arrange the biscuits on a rustic wooden board for a cozy touch. stack ’em high for a casual vibe or spread them out nicely on a white plate for a clean look.
Garnish Ideas : Add a sprig of parsley on top or even sprinkle a pinch of paprika for some color!
Color Combinations : Think about serving them with a vibrant salad. The greens will contrast beautifully against the golden hue of the biscuits.
Visual Appeal Tips : Don't forget to show off that melted garlic butter on the side. It looks delicious and gives an inviting touch.
Storage & make-ahead
Now, you might be wondering about storage . Trust me, you'll want to keep these babies around as long as possible!
Storage Guidelines : Store any leftovers in an airtight container. They should last about 2-3 days at room temperature.
Preservation Methods : If you’ve made a big batch (smart move!), freeze the extras! Just wrap them well, and they’ll be good for a month.
Reheating Instructions : To reheat, pop them back into the oven at 350° F for about 5– 10 minutes. You want them warm but not dried out!
Freshness Duration : For the best taste, enjoy them fresh, but I promise they’re still pretty tasty a day or two later.
Creative Variations
Let’s get a little wild with some creative variations .
Flavor Adaptations : Want something different? Try adding cooked, crumbled bacon! Who can say no to bacon?
Dietary Modifications : Got gluten-free friends? Use a gluten-free flour blend; it works beautifully here.
Seasonal Twists : In the fall, why not incorporate some shredded cheddar and diced jalapeños for a spicy kick?
Regional Variations : If you’re feeling adventurous, why not try a Tex-Mex spin? Add some chopped green chiles and pepper jack cheese. Yum!
Complete Nutrition Guide
And for those who care about the nitty gritty, here’s a quick look at the nutrition .
Detailed Breakdown : One of these bad boys packs about 200 calories . Not too shabby for a biscuit!
Health Benefits : Cheddar cheese brings protein to the party along with calcium, which is a win-win.
Dietary Considerations : If you're on a low-carb diet, you might wanna enjoy just one or skip the butter glaze.
Portion Guidance : I mean, these are perfect for brunch. Serve two per person, especially if you’ve got biscuits AND gravy going on.
Expert FAQ Solutions
Finally, I’m sure you have some questions. Here’s my FAQ solutions for the common ones.
Common Questions : "Why are my biscuits tough?" Don’t overmix the dough; gentle is the name of the game here.
Troubleshooting Guide : If they don't rise, check that your baking powder is fresh; it should be bubbly in water.
Success Tips : Always use a light hand when shaping your biscuits to maintain the fluffy nature.
Variations Explained : Add-ins like cheese or bacon? Just fold them in gently; you want them throughout, not a cheesy clump!
So, there you have it! with these tips, you’re totally set to make delightful baking cheddar bay biscuits - fluffy & easy .
Remember, baking should be fun! don’t stress too much. embrace a little mess in the kitchen. after all, that’s where the best memories are made.
Happy baking!
Delicious Cheddar Bay Biscuits Recipe

Ingredients:
Instructions:
Nutrition Facts:
| Calories | 200 |
|---|---|
| Protein | 4g |
| Fat | 12g |
| Carbs | 18g |
| Fiber | 0g |
| Sugar | 1g |
| Sodium | 500mg |
