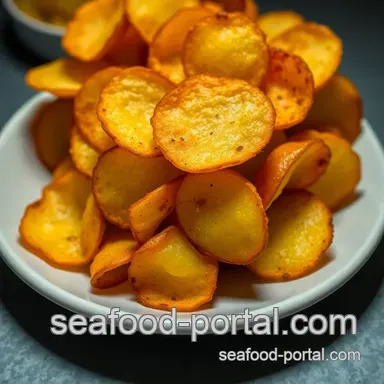
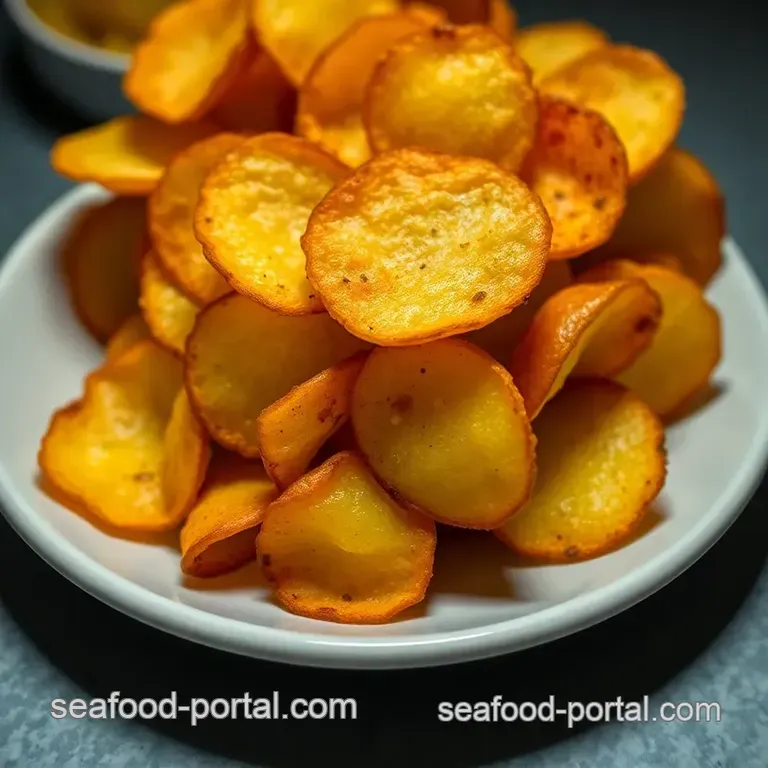
Crispy and Crunchy Homemade Baked Potato Chips

- Recipe Overview
- Key Benefits
- Your Essential Ingredients Guide for Crunchy Homemade Baked Potato Chips
- Essential Preparation Steps
- Step-by-Step Process
- Expert Techniques
- Success Strategies
- look into Into DIY Baked Potato Chips: Pro Tips & Secrets
- Perfect Presentation
- Storage & Make-Ahead
- Creative Variations
- Complete Nutrition Guide
- Frequently Asked Questions
- 📝 Recipe Card
Hey there, fellow snack ensoiasts! so, picture this: it’s movie night, the couch is set up perfectly, and i reach for a bag of lays baked potato chips.
But wait what if i told you that instead of reaching for that bag, i could make my very own at home? yup, that’s right.
That perfect crunch you crave? you can totally achieve that in your kitchen. trust me, there's just something magic about homemade potato chips that pay homage to those iconic lays style potato chips we all know and love.
This isn’t just about munching away, though! by making your own oven baked chips , you're diving into a world of flavor, crunch, and a healthier snack that can rival any store-bought option.
Plus, you get to control what goes into them. no weird preservatives, just good ol’ potatoes and your favorite seasonings.
Are you excited? because i sure am!
Recipe Overview
Let’s take a quick trip down memory lane. did you know that the concept of potato chips dates back to the late 1800s? a chef named george crum supposedly created the first batch at a restaurant in saratoga springs, new york.
Today, potato chips have become a staple across america and beyond. whether you’re at a cookout, a party, or just munching on them at home, these crunchy treats are here to stay.
Making homemade potato chips is not just modern day convenience; it’s a fun project that anyone can tackle. honestly, this recipe isn't going to put you in the kitchen for hours either! you’ll need around 1 hour and 10 minutes from start to finish, and it requires minimal effort.
No culinary degree needed; just a knife and an oven will do the trick.
These chips won’t break the bank either. with just two large russet potatoes, some olive oil, and your favorite seasonings, you can serve about four people for around $5.
Seriously, a bargain for a healthy snack that everyone will love.
Key Benefits
So, why should you make these crispy chips instead of grabbing that bag off the shelf? well, first off, health benefits galore! these oven-roasted potato slices are much lower in fat compared to traditional fried chips.
Using just a drizzle of olive oil means you’re serving up low-fat snacks that are also gluten-free. there’s something satisfying about knowing exactly what’s mixed into that crunch.
These chips also make a fantastic party snack idea . picture it: having friends over, serving these golden beauties fresh from the oven, and watching everyone dive in.
They’re perfect for those awkward moments when you need something easy to munch on, yet impressive. plus, you can customize the flavors to your heart's content.
Want spicy chips? sprinkle on some cayenne. craving something cheesy? try rigging them with nutritional yeast. seriously, the possibilities are endless.
This is purely your personalized potato wonderland!
Another great thing? these chips taste way better than most store-bought options, and you can create variations that are healthier, like using sweet potatoes or jazzing up the flavors with herbs and spices.
Say goodbye to bland snacks!
Ready to get into the fun part? let’s talk ingredients. you’ll be just a few slices away from perfectly crispy chips that rival the store-bought goods.
If you’re itching to dig in, stick around because we’re diving into what you need to make these crispy delights!
Your Essential Ingredients Guide for Crunchy Homemade Baked Potato Chips
When it comes to making crispy and crunchy homemade baked potato chips , there’s nothing like the satisfaction of biting into a chip you crafted all by yourself.
Let’s take a stroll through the essential ingredients that’ll not only set you up for success but make your kitchen smell divine too.
Premium Core Components
First things first, let’s talk quality . We’re going to need just a few core ingredients to craft those perfect chips.
- Potatoes : Aim for 2 large russet potatoes (about 500 grams). Look for those firm, unblemished spuds. Avoid any with green spots or soft spots; they won’t give you that satisfying crunch we’re after.
- Olive Oil : About 2 tablespoons (30 mL) is all you need. Go for high-quality extra virgin if you can. It makes a noticeable difference. Want to keep it simple? Any neutral oil will do, but olive oil adds that finesse you crave.
- Salt : A good teaspoon of sea salt (5 g) is just right for flavor. If you want to jazz things up, feel free to sprinkle in some paprika or black pepper .
Signature Seasoning Blend
Now, let’s spice things up! A classic chip is incomplete without some signature seasonings.
- Think about using essential spice combinations like garlic powder, onion powder, or even a little cayenne for a kick!
- Herb selections can elevate your chips to gourmet status. Try pairing rosemary or thyme for those herb flavored potato chips . So dreamy!
- For flavor enhancers, a pinch of nutritional yeast can give you that cheesy vibe without dairy. Plus, we’re keeping it healthy with these low-fat snacks !
Smart Substitutions
Life happens, right? If you find yourself short on something, don’t sweat it.
- Common alternatives, like using canola oil instead of olive oil, work just fine.
- For those watching their sodium, consider substituting regular salt for herbs or even spice blends to season. This makes for tasty, low-calorie snack alternatives !
- Find yourself craving sweet potato chips instead? Use sweet potatoes! This gives you a whole new flavorful twist on the traditional recipe.
Kitchen Equipment Essentials
You don't need a fancy kitchen to pull this off! A couple of basic tools will do.
- A sharp knife or mandoline slicer is key to achieving those perfectly thin slices. Consistency here is everything!
- You’ll need baking sheets and possibly parchment paper to keep your chips from sticking.
- And don’t forget a good large bowl for soaking your potato slices.
Everything Has Its Place
So, you’ve got your quality components, playful seasonings, and right tools. Now, what about storing and making sure freshness?
- Storage guidelines ? Keep your chips in an airtight container if you have leftovers (though they usually disappear fast!). They should stay fresh for up to a week if you can resist!
- Freshness tips ? Always check for those pesky soft spots before buying your potatoes. Fresh ingredients make for the best easy homemade snacks .
In the end, making lay-style potato chips at home isn't just about the act of cooking; it’s a little love letter to yourself and whoever you’re sharing with.
Trust me, when you pull those crispy treats from the oven, you’ll be the star of snack time.
Now that you’re armed with this essential ingredients guide , let's dive into making those delightful oven baked chips that'll beat the store-bought variety any day! Ready? Let’s hop into the instructions section to make those chips happen!
Essential Preparation Steps
When you're ready to tackle making your own lays style potato chips , the first thing you gotta do is focus on mise en place .
Yep, it sounds fancy, but it just means getting everything set up before you start cooking. grab those russet potatoes, olive oil, sea salt, and any fun seasonings you want.
It makes the cooking way smoother, trust me.
Time management is key here, folks! set a timer if you need to. like when i made homemade potato chips for a party, i had everything prepped and ready to roll in about 15 minutes of active prep .
Always better to have your stations set 'cause no one wants to be scrambling around looking for that mandoline slicer mid-cook!
Organization strategies? keep your tools easy to reach! have your baking sheets stacked and your ingredients lined up on the counter.
The last thing you want is to misplace your knife while you're slicing those thinly sliced baked potatoes . safety first, always! watch those fingers when you're slicing; they can get slippery when you’re trying to create those light and crispy snacks !
step-by-step Process
Alright, here’s how to make your crispy chip recipe :
- Preheat the oven to 400° F ( 200° C) .
- Wash your russet potatoes. Don't be lazy scrub 'em good! Peel if you like, but I usually leave the skins on for that rustic flavor.
- Now, slice those potatoes thin. Aim for about 1/16 inch thick . A mandoline makes this super easy; just be careful with it you don’t want a trip to the ER!
- Soak the slices in a large bowl of cold water for 30 minutes . This removes excess starch and helps the chips become super crispy thank me later.
- Time to drain and dry those slices! Use a clean kitchen towel and get them nice and dry.
- Arrange the potato slices on your baking sheets, lined with parchment paper if you're fancy.
- Drizzle with 2 tablespoons of olive oil and sprinkle with 1 teaspoon of sea salt . Want some extra flavor? Toss in a little paprika or black pepper.
- Bake those beauties in the oven for 20- 25 minutes . Keep an eye on them— visual cues for doneness : they should look curled and golden brown.
- Let them cool slightly before you dive in trust me, they’ll be even crunchier!
Expert Techniques
Here’s where the magic happens! To get those perfectly crispy chips , I recommend using a mandoline for consistent slices. If you slice them too thick, they won’t crisp up nicely.
During baking, it's essential to keep an eye on temperature. and if they’re not cooking evenly, rotate the baking sheets halfway through don't skimp on this step! quality checkpoints? just listen for that satisfying crunch when you bite into one.
If for some reason your chips come out soggy, don’t sweat it. Let ‘em cool down a little longer. Sometimes, they surprise you and crisp up after a few minutes!
Success Strategies
Now, let's talk common mistakes. don’t overcrowd the baking sheet! give each chip space to breathe. a good rule of thumb is to arrange them in a single layer.
Also, be mindful of your timings and stick to the 20-25-minute cook time.
For making sure quality? taste test your chips and season them to your liking! you can even get creative with potato chip seasoning ideas .
Maybe some garlic powder, or if you're feeling adventurous, cayenne for a kick!
Wanna prep ahead? you can soak the chip slices a day before and just store them in the fridge. or, whip up a batch and snack on them while binge watching your favorite show.
When i serve these, i like to pair them with homemade dips like a cool ranch or spicy guacamole. they make for great party snack ideas or just a chill evening on the couch.
So there you have it, a simple yet delicious journey into homemade potato chips!
Now, if you’re looking for more insights, let’s transition to additional information on different types of easy homemade snacks and other delicious recipes you can whip up in no time!
look into Into DIY Baked Potato Chips: Pro Tips & Secrets
Oh, let me tell you, making homemade potato chips is a game changer! you can have that satisfying crunch in a healthier way no frying necessary! let’s break it down so you’re ready to whip up some lays baked potato chips right in your kitchen.
Pro Tips & Secrets
Chef’s insights: trust me, soaking those thinly sliced potatoes is a must! soaking helps remove excess starch, which means crispier, crunchier chips.
Did i ever skip this step? yeah, once. and my chips were good, but they were nowhere near as incredibly crunchy as the soaked ones!
Time Savers: When you're prepping, have everything on deck. Use a mandoline for even slices; it’s a real time saver. Why struggle with a knife when you can do it in seconds?
Flavor boosters: don’t be shy with your seasonings! try out potato chip seasoning ideas like garlic powder, cheddar cheese dust, or even a hint of ranch dressing mix.
You’re the master of your chip flavors!
Presentation tips: once your chips are all golden and crispy, pile them high on a nice serving bowl. add a sprig of parsley on top for a pop of color.
Use bright, colorful plates to make everything look more inviting!
Perfect Presentation
When it comes to plating techniques , presentation doesn’t need to be complicated. Just remember that people eat with their eyes first! So, think colors!
Garnish Ideas: A sprinkle of chopped herbs like parsley or dill adds a nice touch. You can even sprinkle some paprika for that eye-catching look.
Color Combinations: Pair your homemade chips with vibrant dips. A bright green avocado dip or a bold red salsa will make your chips pop off that plate.
Visual Appeal Tips: Stack chips in a cone made from parchment paper. It’s fun, easy, and gives a rustic vibe perfect for parties or movie nights I'd say it's one of the best easy appetizer ideas out there!
Storage & make-ahead
If you're like me, you might find yourself making more oven baked chips than you can handle! Here’s how to store them:
Storage Guidelines: Keep your chips in an airtight container at room temperature. They’ll stay crispy for about 3 days.
Preservation Methods: For longer storage, freeze them in a single layer on a baking sheet before transferring to a freezer bag. Just be sure to let them cool completely first!
Reheating Instructions: Got leftovers? Pop them back in the oven for a few minutes to regain that crunch . Please, don’t try microwaving them no one wants a soggy chip!
Freshness Duration: Ideally, these chips are best when freshly made. But if you store them well, three days isn’t too shabby!
Creative Variations
Get ready to think outside the box with these snack recipe variations !
Flavor Adaptations: Want a spicy kick? Use cayenne pepper and chili powder. You're going international with those chips!
Dietary Modifications: gluten-free? No problem! Just use the same ingredients and ensure all your seasonings are gluten-free.
Regional Twists: Ever tried herb flavored potato chips like rosemary or thyme? Trust me; they're a hit ! Totally elevates the whole chips experience.
Seasonal Inspirations: During the fall, try swapping regular potatoes for sweet potatoes. A surprising spin with a sweet potato chips recipe? Count me in!
Complete Nutrition Guide
Feeling guilty snacking? Let’s break down what you’re munching on.
Nutritional Breakdown: On average, each serving packs about 150 calories. Sure, there's fat, but it's from olive oil, which is a good thing !
Health Benefits: Homemade chips are lower in saturated fats than traditional fried chips. Plus, you control the salt. Hello, healthier snacking!
Dietary Considerations: For a heartier snack, consider adding nuts or seeds to your chip platter. Boom! Instant protein.
Portion Guidance: Keep an eye on those serving sizes one ounce is your sweet spot. Not that I wouldn’t sneak a little extra... just saying!
So there you have it! making easy homemade snacks at home is not only doable but also super fun. get creative with your flavors.
Share them with friends, or just crunch away during your next netflix binge. enjoy this journey of homemade goodness, and remember, every chip tells a story let yours be delicious!
Frequently Asked Questions
How do I make sure my lays baked potato chips come out crispy?
To ensure crispy lays baked potato chips, it's essential to soak the sliced potatoes in cold water for about 30 minutes. This process removes excess starch, which helps achieve a better crunch when baking. Additionally, make sure to pat the slices very dry before oiling and baking.
Can I use different kinds of potatoes for this lays baked potato chips recipe?
Yes, you can experiment with different types of potatoes! While russet potatoes provide a classic flavor and texture, you may also use sweet potatoes for a sweeter alternative or Yukon golds for a buttery taste. Keep in mind that cooking times may vary slightly with these options.
What seasonings work well with homemade lays baked potato chips?
Homemade lays baked potato chips can be customized with a variety of seasonings. Popular options include paprika, garlic powder, cayenne pepper for a kick, or even lemon zest for brightness. You can also create a cheesy flavor by adding nutritional yeast or powdered cheese before baking.
How should I store my leftover lays baked potato chips?
To keep your lays baked potato chips crispy, store them in an airtight container at room temperature. Avoid refrigeration, as it can introduce moisture. If they lose their crunch, you can re-crisp them in the oven at a low temperature for a few minutes.
What are the nutritional benefits of making lays baked potato chips at home?
Making lays baked potato chips at home allows you to control the ingredients and reduce unhealthy additives often found in store-bought versions. They are typically lower in calories and fats since they are baked, not fried.
Additionally, you can customize the seasoning to suit dietary preferences or avoid excess sodium.
Can I batch cook lays baked potato chips for a party?
Absolutely! You can double or triple the recipe and bake multiple trays at once, just ensure they are spread out to allow for even cooking. It's a great way to prepare for gatherings, and once cooled, they can be stored for later enjoyment or served fresh during the event!
Crispy And Crunchy Homemade Baked Potato Chips